
Courtesy of Outex, a SwimSwam partner.
It’s easier than ever – and great fun – to get professional results underwater, whether you’re shooting videos or still images. These tips are the foundation for professional-level imaging underwater, guiding you on all aspects of technique, best gear, improving confidence, unlocking your creativity, and avoiding mistakes. These tips are not a shortcut. It’s a journey of discovery that towards memorable, noteworthy, stunning results that you can enjoy for a lifetime.
- BEST CAMERA AND LENS TO USE
- CAN I USE MY PHONE OR ACTION CAM?
- BEST WATERPROOF HOUSING FOR MY GEAR
- USING DOMES TO REDUCE DISTORTION
- FOLLOW THE LIGHT
- PRACTICE & EXPERIMENTATION
- CREATIVE VISION
- MASTERING MANUAL MODE
- SETTINGS & WHITE BALANCE
- POSTPRODUCTION EDITING
1. BEST CAMERA AND LENS TO USE
Cameras
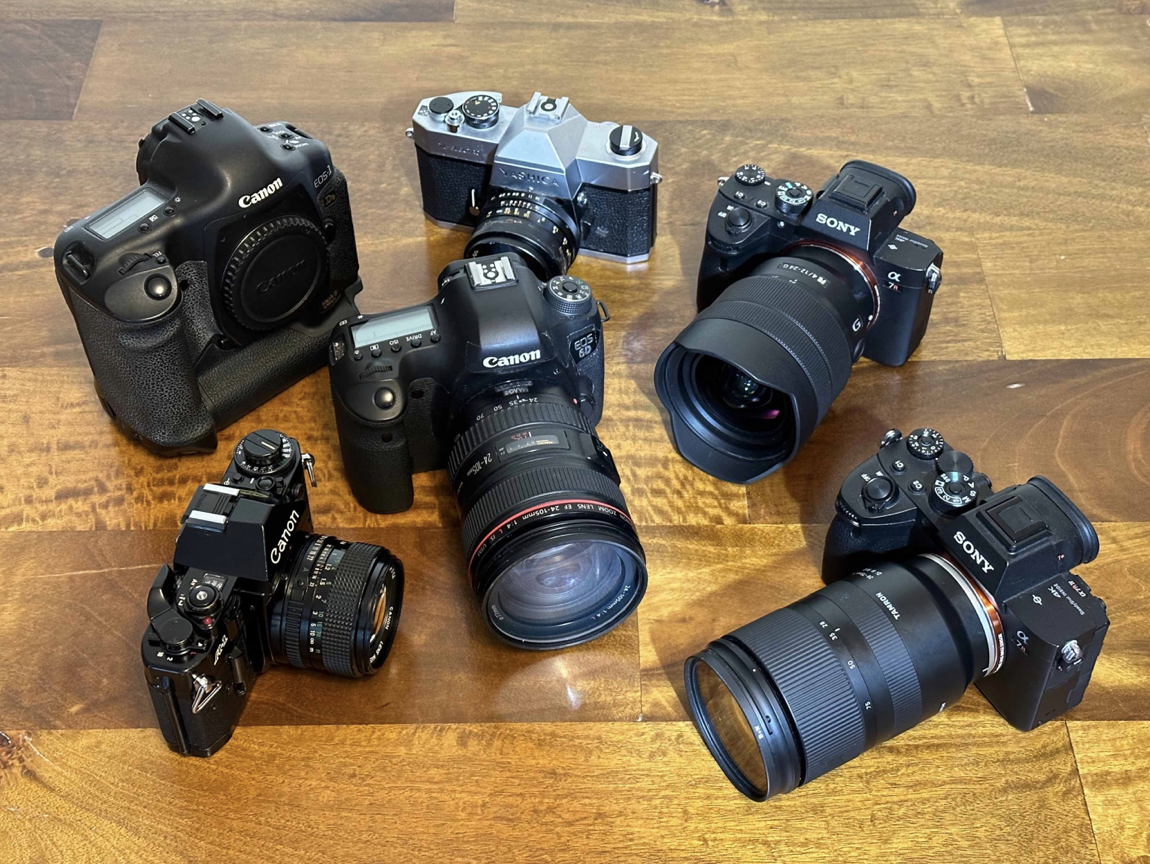
There is no right or wrong when it comes to camera choices. There’s a saying in photography that “the best camera is the one you have.” It is hard to go wrong when purchasing a modern camera today, and it’s usually better to master the camera you have than not know how to use the resources on your state-of-the-art camera. Use the best camera you can afford, but think of it as a “tool, not a jewel.” Your creativity should not be limited or bound by technology.
While there are differences between film, DSLR, mirrorless, and medium format cameras, all of them can deliver stunning results the more skilled you become, and especially if they accentuate your creative vision. If possible, use a camera that lets you select aperture, depth-of-field, and shutter speed. All digital cameras will also let you select ISO and other settings. Not relying on “Auto” mode to shoot your images will likely be the single biggest differentiator in your work if you’re looking to build an impressive, memorable portfolio or body of work. The latest technology and easiest cameras to use these days are called Mirrorless. They offer several advantages over all their predecessors. As with most technologies, these mirrorless cameras incorporate all previous capabilities, great additional features, resolution, controllable settings, and are easy to learn and use.
Lenses
I would argue the lens makes a bigger impact on your imaging than the camera. There’s another saying by photographers that says, “Date the camera. Marry the lens.” That’s true in part because the cameras have gotten so good, it’s hard to go wrong, as I’ve said before. But it’s also true because the stage and rate of technological evolution are different for each one. The optical evolution in lenses is already at the edge of the boundaries of physics, so it’s hard to ‘cheat’ physics, while cameras (specifically digital cameras) are still innovating at breakneck speed in various dimensions, both in hardware (speeds, capabilities, storage, size, heat dissipation, etc.) as well as software. In a way, the lens is the bottleneck. A good lens can yield good results on a mediocre camera. A mediocre lens cannot yield good results even on a great camera.
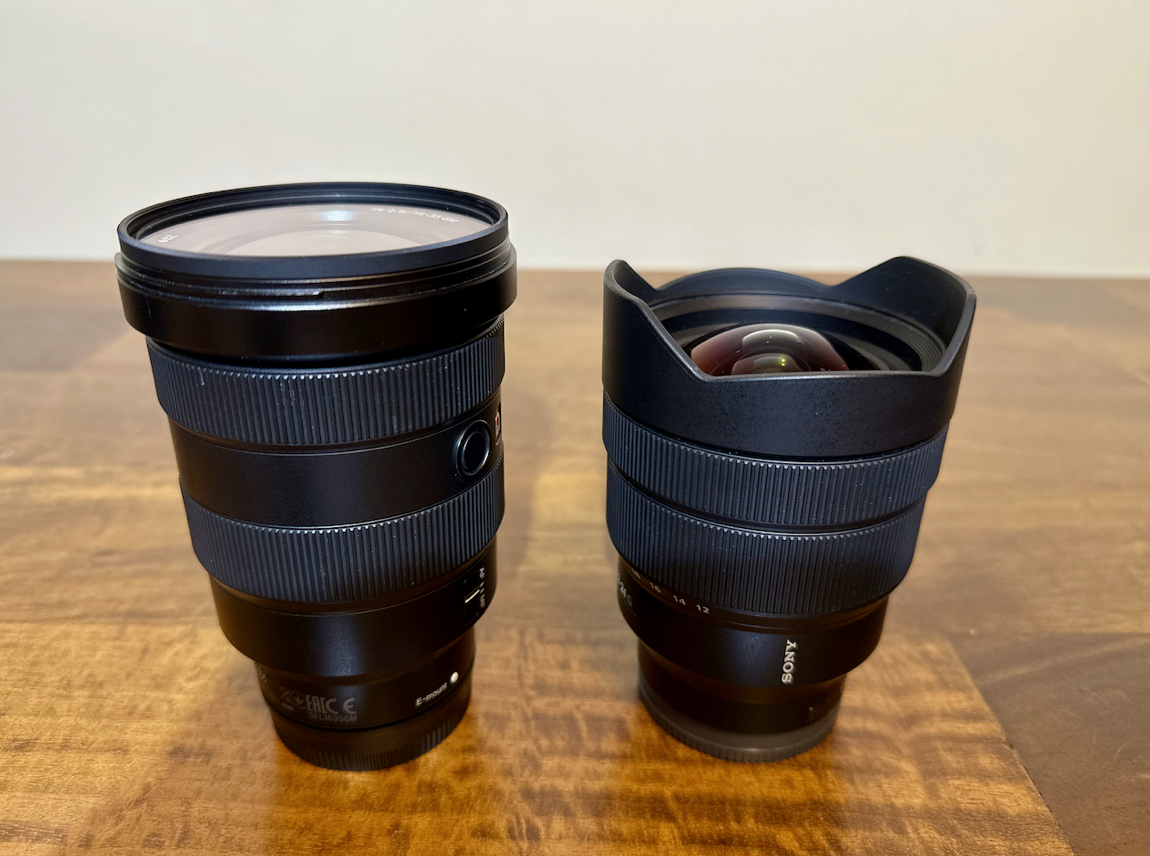
There’s no absolute holy grail of lenses either, but in general, you want to go as wide as you can, for multiple reasons. The water creates much more visual pollution than air. So compared to above water, the eye can see more color reflections, which is why water appears blue, green, brown, etc. depending on location, and makes the subject grainier, more distorted, and more opaque the further away you are. Wide-angle lenses work best because being close to the subject reduces distortion of light, water “pollution”, and visual degradation. In other words, proximity to the subject reduces distortion and maximizes optical sharpness & focus. It reduces lighting variance as well, giving you greater control.
You can use fixed focal-length (or native lenses), or variable focal-length lenses that zoom in & out. Zooming lenses give you greater flexibility, as everything in water is usually moving, and increase your control over variables. And I suggest rectilinear wide-angle lenses, versus fish-eye lenses, so the lens itself mimics more of what the human eye is accustomed to seeing. My suggested focal length range is between 12-35mm (focal length). For example, 12-24mm or 16-35mm lenses make for fantastic underwater solutions. Lenses are also rated for how much light they allow in, measured as f-stops. Lower numbers mean more light. In general, I suggest getting the lowest F-Stop lens you can afford, but anything F/4 or below is a great lens. For example, an F/2.8 version of a 16-35mm lens is “better” (and more expensive) than its F/4 equivalent. But both are great.
At the end of the day, it’s about preferences, and choosing tools that will allow you to execute against your vision. Each one of these 10 steps is related to another. Grab what you have and move on to the next steps. You can always upgrade cameras and lenses over time.
2. CAN I USE MY PHONE OR ACTION CAM?
Yes. Cameras are superior to smartphones and action cams in various ways. But each is evolving at a different pace, and they are designed for different purposes. You can absolutely use smartphone cameras and action cameras to deliver professional imaging results, and most professionals do. But they are usually complimenting their camera work using phones and action cams rather than relying on them. Here’s an overview of some of the differences.
Action Cams (like GoPros)
As the name suggests action cams were designed to capture action sports and activities, often from a selfie perspective. They have limited optical and functional capabilities to fit their size and price point. They usually only have one fixed very wide-angle focal length that cannot be changed, small lenses that rely on software, and few adjustable settings you can control. This limited functionality means they are very good at few things and are therefore excellent if your needs match their capabilities. They are not versatile, but make a great compliment to an arsenal, especially if your vision includes video.
Smart Phone Cameras
It’s not a stretch to say that smartphones are superior to action cams in almost every way. They have fewer limitations for hardware, software, optics, and connectivity, which also allows them to improve over time with the advent of improved software updates. The camera has virtually taken over the smart phone business and every manufacturer continues to pour resources and development into the optical/imaging qualities of their phones. Cameras have advantages related to physical attributes that are difficult to beat (physical space, ergonomics, optics, exchangeable lenses, accessories, software etc. But phones continue to close the gap. And it’s not difficult to envision a roadmap where current professional lenses can eventually be used with smartphones as harmoniously and interchangeably as they work with cameras today. In other words, imagine connecting your 16-35mm f/2.8 lens to a phone that offers the same capability as your mirrorless camera, in a not-too-distant future.
But we’re not there yet. Because phones are small (compared to a camera & lens), they rely heavily on software. The phones don’t offer the same hardware capabilities, and more importantly, their small lenses cannot make up in software what a much larger lens can do (again, physics). They use software technology to enhance and augment the phone’s lens limitations by approximation, interpolation, and other techniques that look good in a small screen. In other words, a phone’s capabilities may look ok to the average person on a pad, computer, or even TV screen. However, their weaknesses become increasingly noticeable by discerning observers, especially as screen sizes increase.
3. BEST WATERPROOF HOUSING FOR MY GEAR
All products have pros & cons, so it’s best to think in terms of “what’s the best underwater system for me and my purposes. On one end of the spectrum, plastic bags are inexpensive and universal but yield unprofessional results. You’re shooting through plastic, and it’s very difficult to control the functions of your camera. On the other end, hard cases yield professional results, but are heavy, bulky, specific to a particular camera & lens, and expensive, starting around US $1,500 dollars. Even then you’re shooting through plastic/acrylic, and optical ports cost a lot more. Hard cases also limit the functions and settings you can control and are often not practical outside of their intended use. For example, a surf case cannot be used for diving, and a dive case is impractical for kayaking or paddle boarding. And not all models support mounting, triggers, tethering, or lights. Watch a few testimonials from award-winning photographers and filmmakers from a worldwide community of users here. (https://outex.com/blogs/news)

The Outex system combines the best of both ends of the waterproofing spectrum. It’s the best optical performance because it uses optical glass ports (not plastic/acrylic), even for its domes, and it enables control over all camera & lens functionality. It is universally compatible with all camera and lens brands & models, film, DSLR, mirrorless, video, and medium format. It’s an upgradeable system of exchangeable, compatible parts, just like your camera, so it grows with your needs, and works with tripods, triggers, flash, tethering, mounts, grips, and more. It’s super travel-friendly, adding no weight or bulk to your gear. And it’s affordable, starting at US $300 dollars. There’s a more comprehensive Questions/FAQ forum for underwater camera housing here.
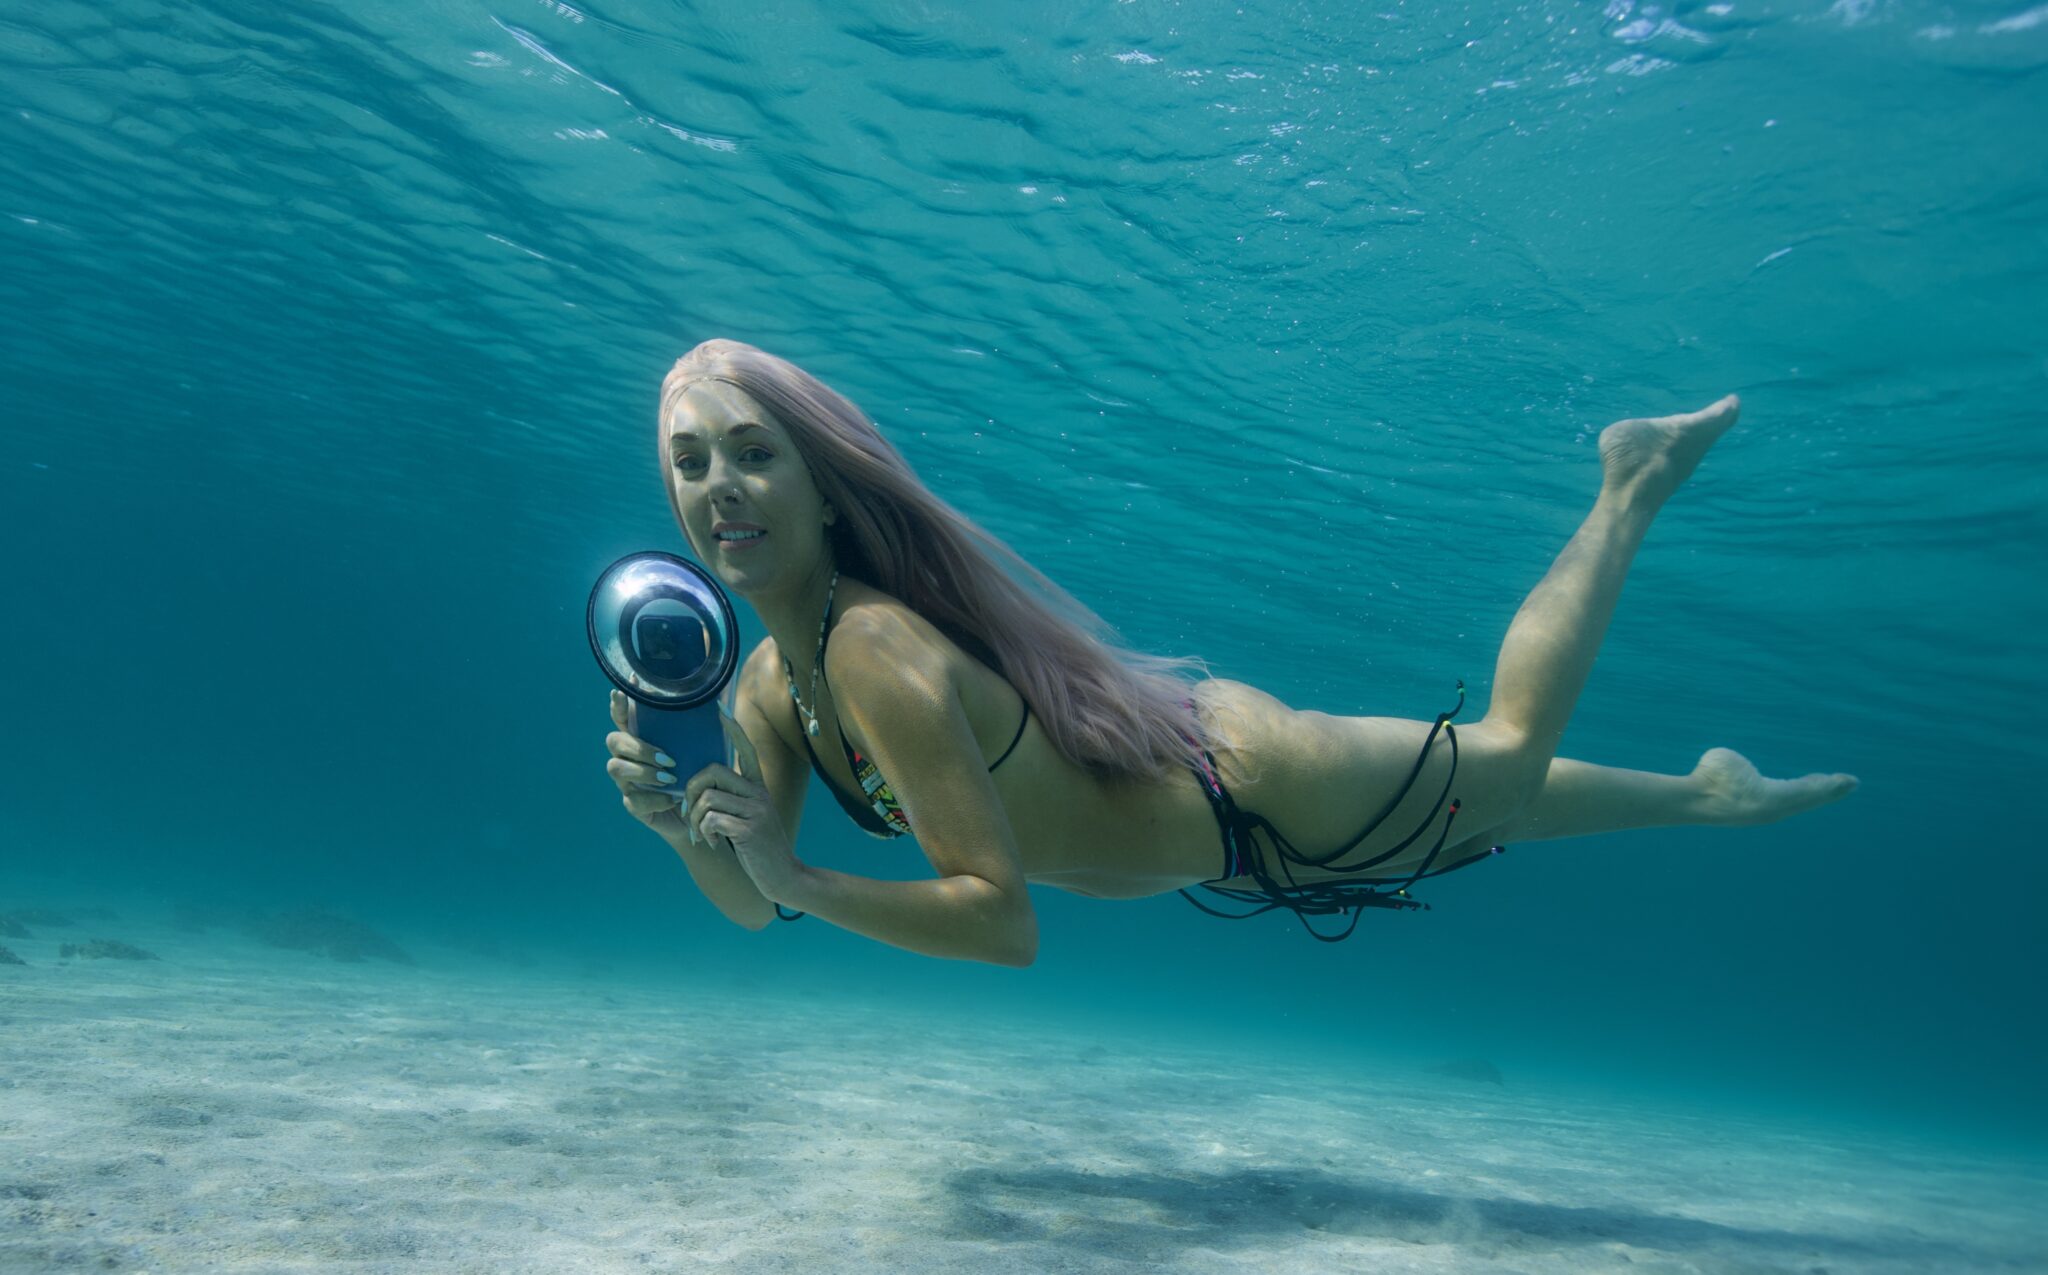
Most phones are water resistant, but chances of damage increase with time spent underwater. There are equivalent solutions for smartphones, and the pros & cons are similar. Plastic bags make it difficult to control the phone both above and below water, and the imaging through the plastic is not professional. Hard cases tend to be phone-specific, limit functional control, and add bulk & weight. The Outex phone case is universally compatible so all brands and models will work, offers optical glass ports for professional imaging results, and maintains tactile control over the touchscreen and hard buttons for underwater use. It’s also compatible with the usual 3rd party accessories such as tripod and selfie-stick mounts, lights, etc. Learn more about frequently asked phone case questions here.

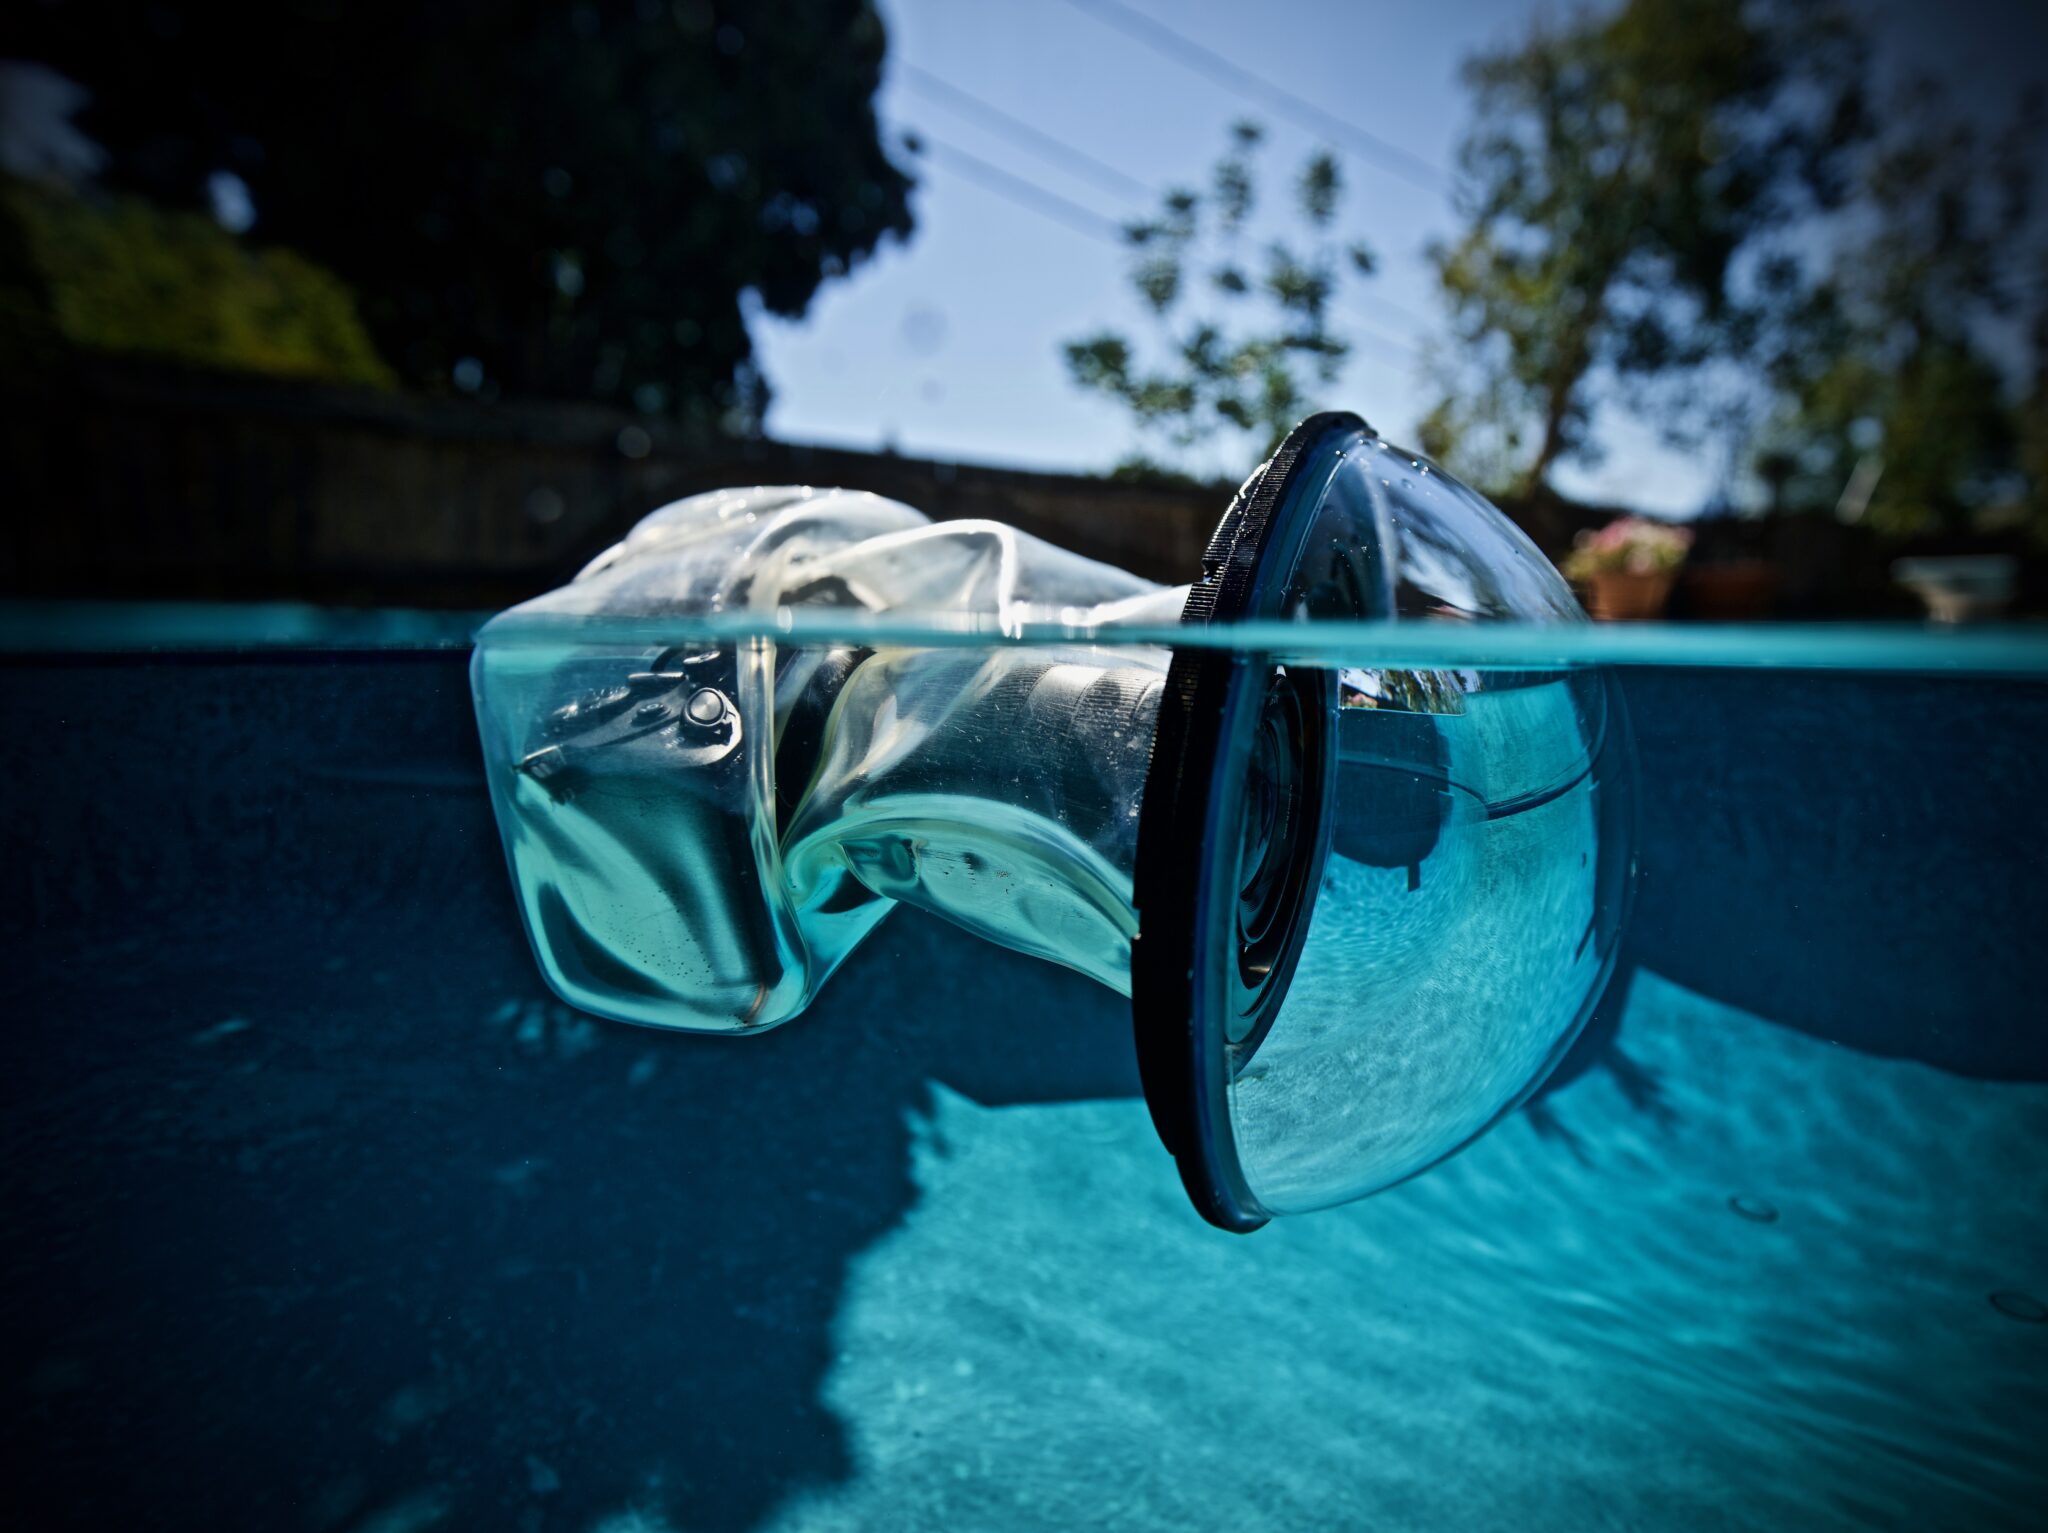
4. USING DOMES TO REDUCE DISTORTION
Dome ports are popular for underwater photography because they help correct distortions caused by changes in the speed of light as it travels from air into water, especially common in split-level images where part of the frame is above and part below water level. Domes reduce the distortionary effects created by the bending of light from air to water, as well as making it easier for the camera and lens to find focus in the desired area of the image when appropriately adjusted. As with most things-photography, everything is on a continuum or spectrum. In other words, you can still capture footage using flat ports, but dome ports reduce these distortions, and make it easier to deliver stunning results more often, and without having to control many of the other factors that play a role, such as distances between the camera and the subject, lighting angles, composition, etc.
Domes also reduce some of the magnification that occurs underwater but have a bigger impact on wide-angle lenses compared to longer focal lengths beyond 30mm as those lenses’ field of view takes place at the center of port, and don’t take advantage of the dome’s curvature and increased field of view. Domes do not alter the image in any way above water, so there’s no downside to using them above water, even though there is also no benefit.

When considering domes, the type of housing again becomes important. Relevant factors to consider include:
- Materials: Optical glass ports are the best optical solution, compared to plastic or acrylic. That’s why your lenses use it. Acrylic can also yield professional results.
- Modularity/Exchangeability: Consider whether you can change/upgrade from flat to dome ports, and from acrylic to glass over time if you choose.
- Scratch resistance: Optical glass ports are the most resistant to scratching.
- Universal lens fit; Can all your lenses be used with the port from your case? That’s often not the case, or significant vignetting can occur on static ports – as is the case with most hard cases. The Outex dome ports are universal and adjust to each/all lenses.
- Transportability: Acrylic is lighter than glass, so glass ports are heavier. But factor in the weight of the whole case/system – not just the dome port.
- Treatability: Consider how you can treat the port material for things like fogging, water-beading, and maintenance (cleaning). Glass offers the widest array of options.

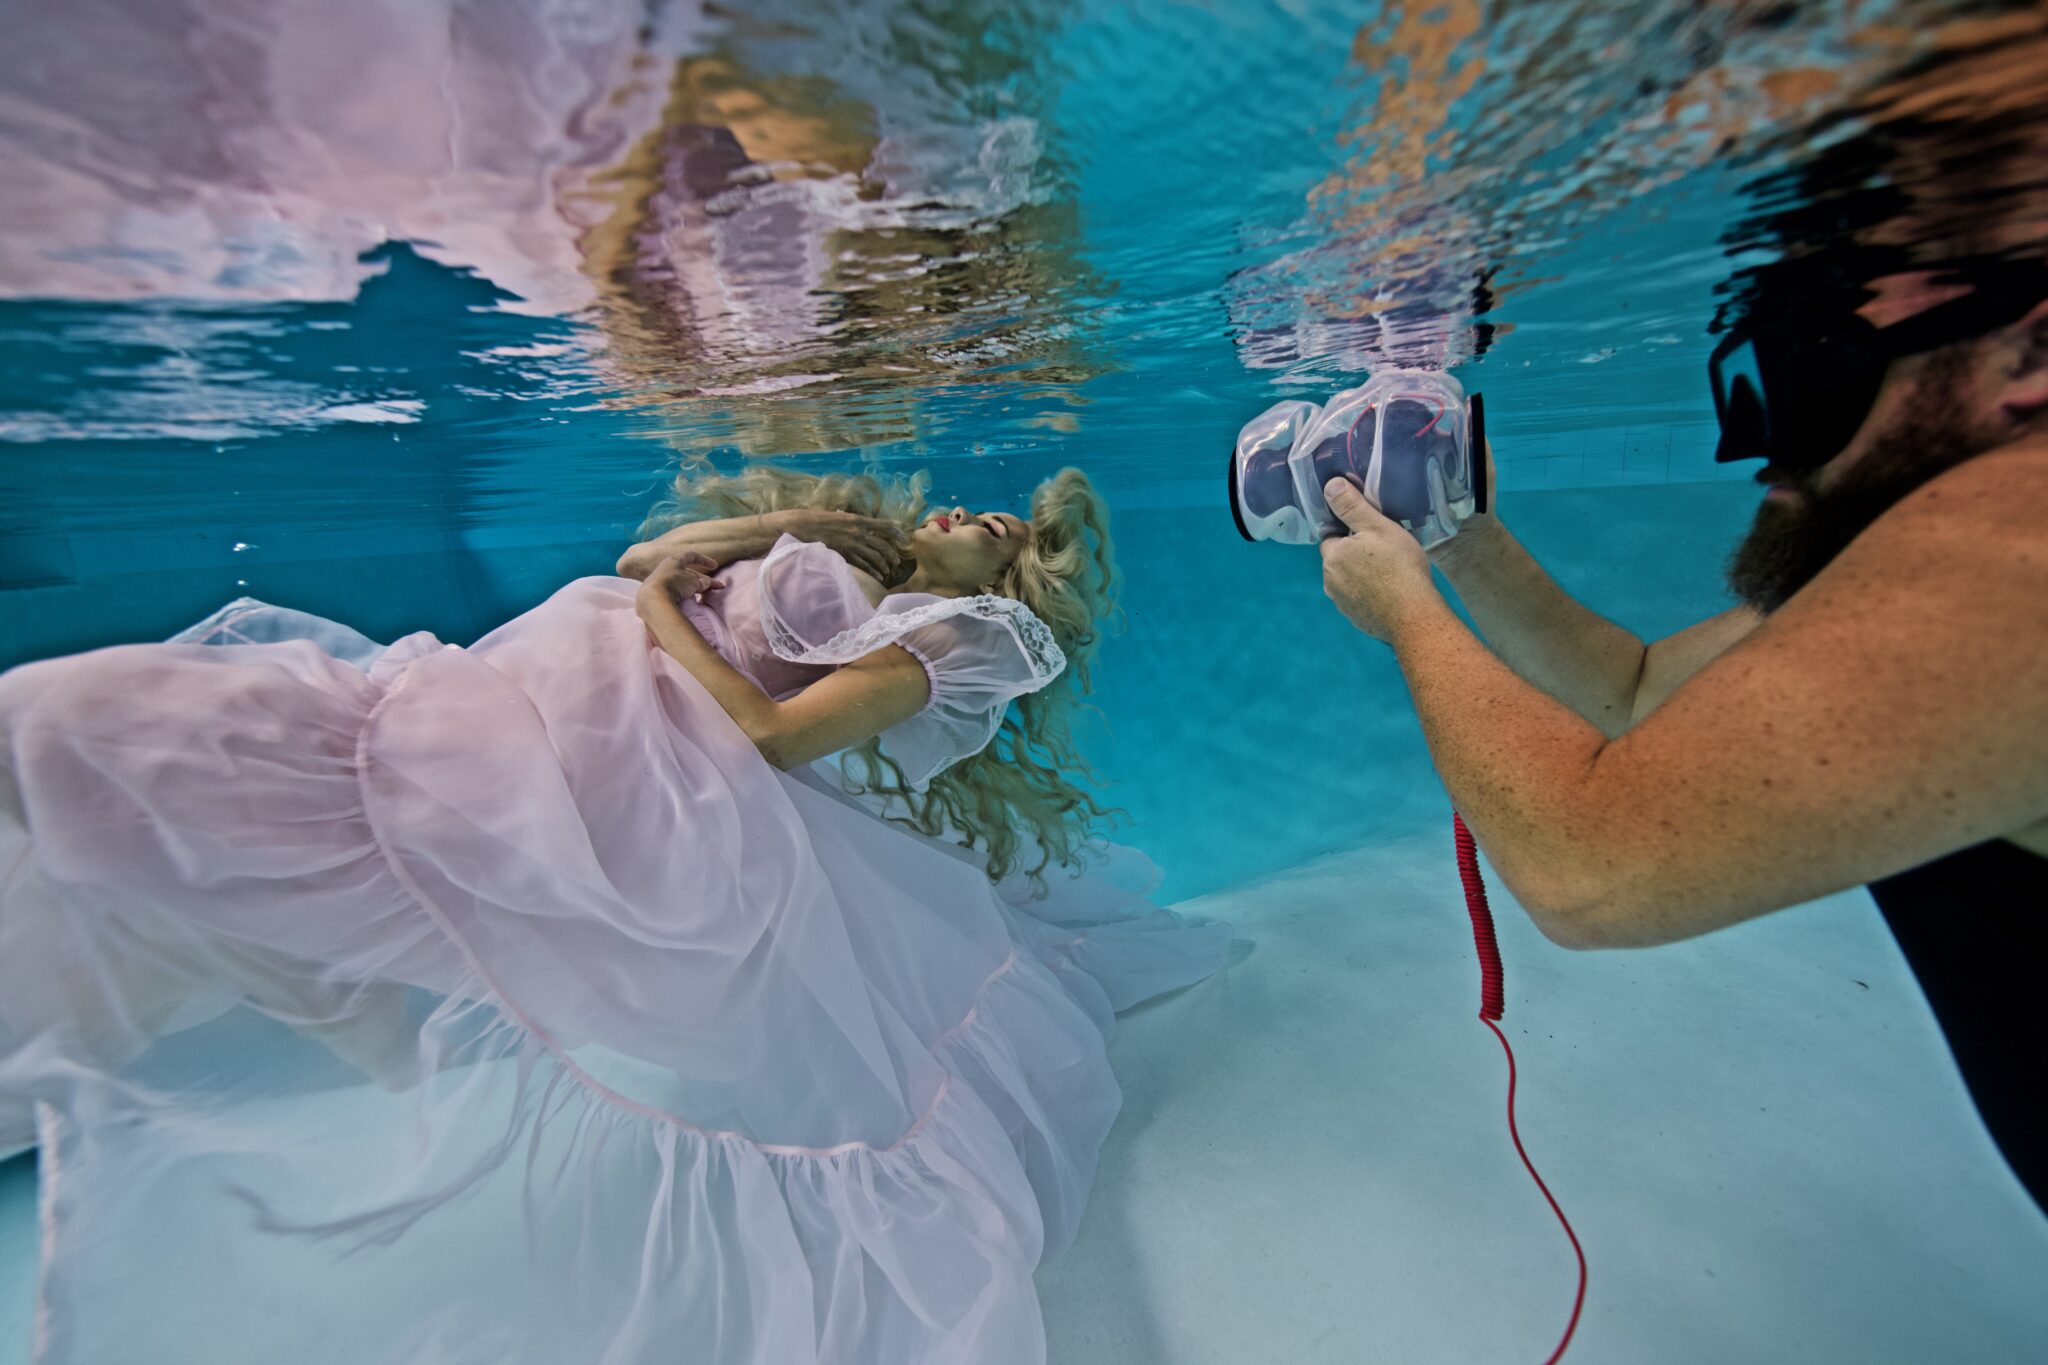
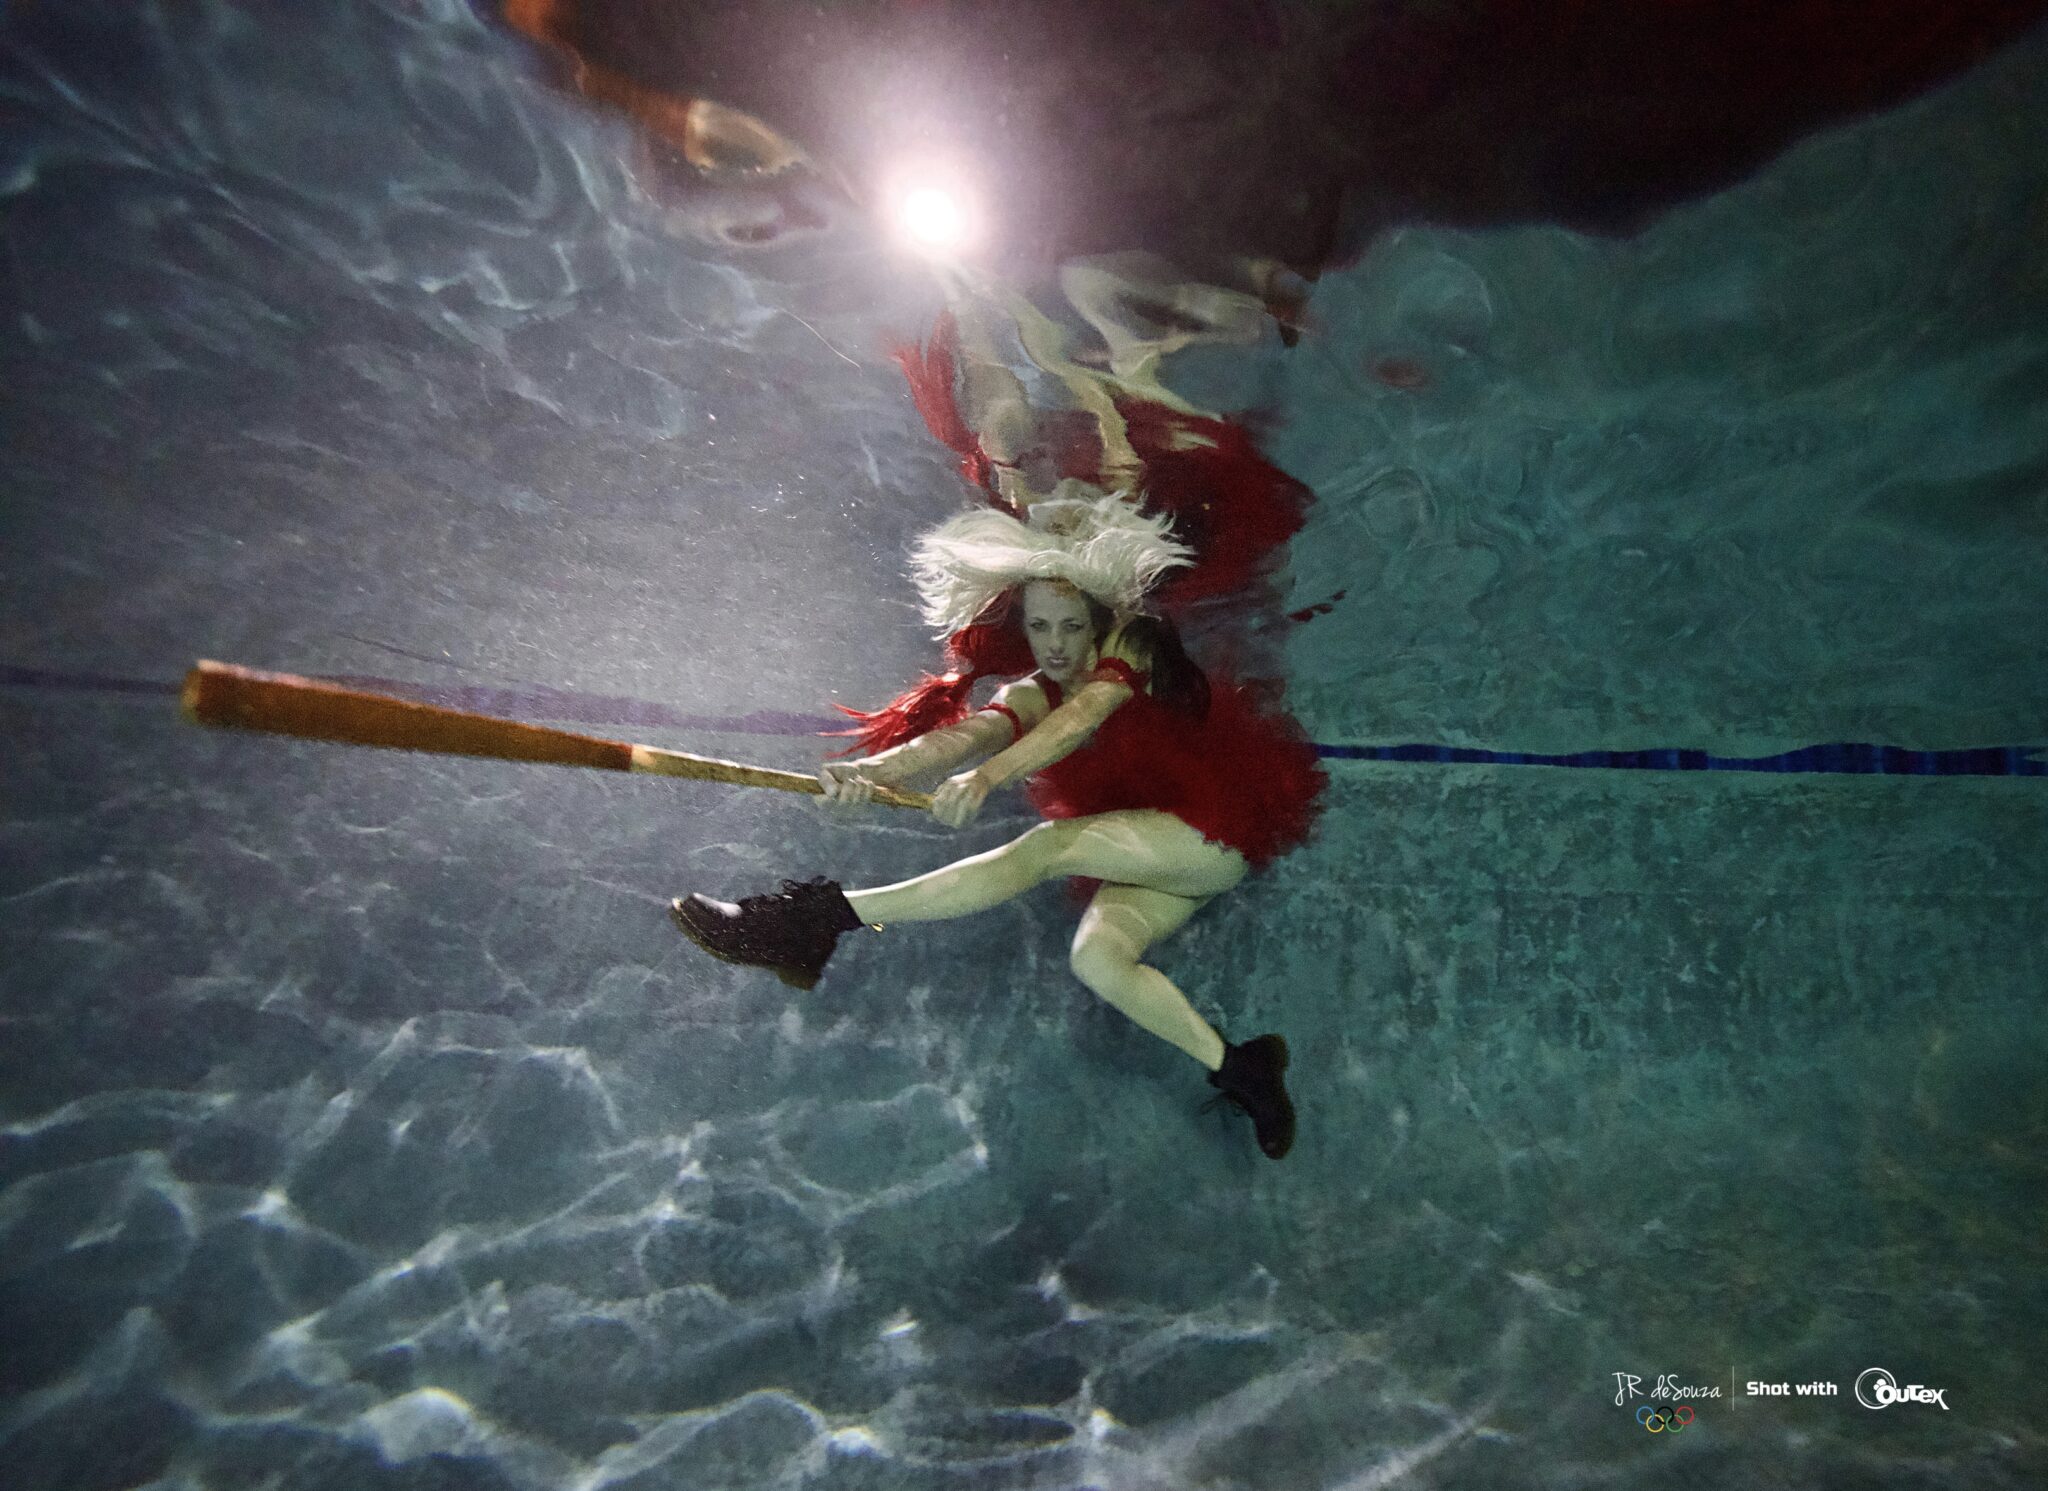
5. FOLLOW THE LIGHT
The word photography stems from Greek to describes “capturing of light”. Lighting is critical for any type of photography, and underwater photography is no exception. As with all photography, there’s no right or wrong way of lighting a shot. There’s only the execution of your vision, or the capture that reflects that moment in time by the viewer, although what you eye sees versus what the camera captures can be very different things. We’ll talk about mastering Manual Mode later. But learning how to control, harness, redirect, or create the “right” light to capture your subject as you want it seen, is the name of the game.
Natural Light
For daytime imaging, is usually easier to embrace than fight natural sunlight. But understanding how to harness it is important. Just like above the surface, it’s important to evaluate the differences in lighting on the subject depending on the direction and intensity of the source. Light dissipates more quickly underwater, so you’ll lose most of it by 10 meters/35 feet. Some important elements to master are listed below, and each impacts the other:
- Timing: Time of day changes the angle at which light enters the water even more dramatically than while it travels through air, so lighting differences throughout the day can make a significant difference in your outcomes below the surface.
- Reflection and refraction: Because of the near-perpetual motion of water, it tends to create reflections and refractions everywhere. Be prepared to recognize it so you can take advantage and circumvent it in different ways as you see fit.
- Shadows and shade: Taking advantage of naturally occurring shade or pulling a large cover over the water can create an evenly distributed, soft amount of light in the water, making it easier to control with your own lights. And that may also help you fill in shadows with reflected or your own light sources, especially if the subject is facing down, or against the natural light sources. Shooting at night means you can control lighting fully, but may require a different set of tools, discussed below.

Strobes and Constant Lighting
There is a growing number of options to an already abundant market of lighting options for underwater photo and video. I will discuss a few recommended options here:
- Above the surface: Tripod-mounted lights around the water can be useful, and you can use constant-on lights to avoid having to trigger them. For video, constant lights are a must. For stills, if you prefer to use strobes above water level, a few housing systems can support it, including Outex. And you can use tethered triggers, or on-board flash from the camera. There are also hybrid lighting systems, like Stella-Pro systems that can be used above water with modular fans that keep them cool, or underwater, generating over 10,000 lumens, close to 100 watts.
- Below the surface: Waterproof lighting options are abundant as well, depending on your budget, desired outcome, and type of housing. Most housings have on-board (camera hot shoe) solutions you can use directly from the camera. Those are the simplest. There are several options for waterproof lights. They can be placed at specific locations, hand-held or tripod-mounted underwater, and can complement natural light, or work independently to achieve your objectives. Well-lit imaging yields a richer, deeper, more three-dimensional look in the end.

Mastering lighting is just as important underwater as it is in any other environment. I’ve experimented with several options and shot with award-winning photographers in several fields. There’s no substitute for preparation when it comes to lighting. Some of it comes from experience and practice, some from scouting your location to match your creative vision, and some from having lighting options that enable you to maximize your results. Try to select the gear (camera, lens, housing, and lights) that maximizes your flexibility, modularity, and capabilities so you can control as many of those variables as possible.

© 2019 | Kristina Sherk Photography | www.Kristinasherk.com
Get a 20% discount on Stella Pro/Light And Motion lighting products by clicking here.
6. PRACTICE & EXPERIMENTATION
Practice makes perfect, goes the saying. And it’s true for imaging. You will carry your above-the-surface experiences with you underwater but will quickly discover it is quite literally a whole new world. In addition to the changes in white balance, colors, temperature, and lighting variances you’ll realize that breadth-holding, floatation, gravity, visibility, and comfort in the water play a much more important role in getting results.
Everything is in constant motion underwater, including the subject, for example. Fabrics, hair, apparel, and the reflections and refraction of light are all constantly changing. Air and water bubbles may get in the way or distract your auto-focus, and controlling your own movements may prove difficult when both hands are occupied with the camera.
Find clear goggles or a mask you like, to optimize visibility underwater, and get the most from your camera’s displays, including the viewfinder. The ability to view your camera’s viewfinder and LCD screens, as well as the ability to control your camera’s functions are critically important underwater. Plastic bags limit both, and hard cases are very rigid (pun intended) as to what you can/cannot do. Not to mention hard cases require you to learn what controls are still available and develop new muscle memory for how to access them through the housing. The flexible, malleable, tactile-rich Outex covers are designed to accommodate any camera body, maintain a tactile feel over buttons and knobs, and enable control over all functions of the gear where you expect them to be. The optical glass ports enable visibility of both viewfinder and LCD screens and even touch sensitivity on smartphones and touchscreens.
If you need additional inspiration or creative ideas, visit a community of underwater creators online. There are many examples on the web and on social media. Here are a few examples:
- Instagram; https://www.instagram.com/realoutex/
- YouTube; https://www.youtube.com/@Outex/videos
- Facebook; https://www.facebook.com/OUTEX/
- Blog; https://outex.com/blogs/community-blog

Thus, practice, exploration, repetition, and experience are key to improvement. The good news is that the journey is magically fun, assuming your pursuit is based on desire. The lack of gravity means you are free to capture images above, below or from any desired direction. Discovering the ways through which all of the movement interacts between the subject and the water itself is completely different from what is possible elsewhere. And you’ll find yourself discovering imaging all over again.
7. CREATIVE VISION
I equate creative vision in imaging as having goals in sports. It can be different for everyone, and it can evolve/change over time. But having a creative vision means knowing what you want or what you’d like to accomplish. Many of my best shots were not attained by accident. They were the result of imagination, planning, and execution. And based on my experience I believe that’s the norm – not the exception.
Natural talent and camera skills can help immensely, but I would argue that the odds of attaining that “lucky shot” or the number of memorable, usable shots in a particular shoot, increase dramatically if you have an idea what you are looking for, have planned how to attain it, and prepared accordingly, whether your subjects are participating in your vision or not. My favorite “locker-room” plaques from my athletic career was “Luck is where preparation meets opportunity.”. And I think that applies for imaging as well. Whether it’s imaging a scenario you’re trying to create, or replicating a painting or visual you’ve seen before, I encourage you to think of the gear (cameras, lenses, housings) as tools to express your creative vision.
8. MASTERING MANUAL MODE
There are thousands of guides, videos, and lessons that explore this topic. I just want to reinforce the importance of leveraging the camera gear as a creative tool rather than equal partner in delivering your creative vision. Think of “Auto” mode on most cameras similar to what computers or artificial intelligence can do compared to the human mind. Auto mode is doing fantastic computational work in terms of reducing shake or unwanted motion, finding focus, and adjusting settings (capabilities of the camera) based on what it THINKS you’re trying to achieve. By taking control of as many of these settings as you can over time, you’re harnessing that computation capability in all the ways you WANT. This is true for video but especially true in still photography, where the same moment in time can tell very different stories depending on how you want your camera to capture it. My suggestion is that you transition from Auto to Priority Mode, where each, and eventually can use Manual mode.

Most cameras let you advance your manual mode comfort level gradually and offer modes that let you control 1 of the 3 key variables of imaging at a time: aperture, shutter speed, and ISO (light sensitivity). Just controlling one of these settings will increase your output control exponentially and unleash your story-telling powers over time. By exploring each individually, you gain dimensional controls over the end results, and can eventually transition to controlling all 3 in real-time, or having enough experience to adjust the other 2 to accommodate the 1 you judge to be the driver for a particular shot. You can also use the camera “readings” to inform your decision-making. Most cameras display these on-screen readings of various settings so you can see what the camera is “thinking”. From those readings, you can switch to the setting you want to control and compensate using the other two using readings for guidance.
Even smartphones now offer advanced, or professional modes that let you adjust aperture (depth of focus) and other settings, as an increased number of users want to differentiate their content creation efforts and take better pictures.
9. SETTINGS & WHITE BALANCE
In addition to aperture, shutter speed, and light sensitivity (ISO), it’s relevant to discuss other useful settings for underwater imaging. White balance is an important factor to consider. Film and DSLR camera shooters rely on light sensors/meters to help calibrate the camera’s settings according. White balance setting in essence “informs” the camera how to recognize the spectrum of colors by adjusting all colors to that particular color of the spectrum – often white. Most digital cameras offer a simple way to calibrate white balance by pointing the camera at a “true” white object in close enough proximity for calibration in that environment. White balance is of particular importance underwater because light further dissipates underwater more quickly than in air, and colors change underwater more quickly than in air. For every meter (3.28 feet) you go underwater the rate at which the colors disappear (due to light loss) increases, first red, then orange, then yellow, then green. Until you are only left with blue. The use of underwater light can further complicate matters.

The good news is:
- If you’re shooting in a pool, you’ll be less preoccupied by these factors, as most of your footage takes place within 10 meters (33 feet) from the surface. And most people have become somewhat accustomed to seeing underwater footage look color-distorted, not only because that’s what the naked eye also sees, but also from other footage they may have seen. But if you’re looking to further accentuate your work underwater and would like your colors to pop with the lighting options you’re using, take the extra step to color-calibrate, or white-balance your settings for optimal results.
- You can also adjust for color and white balancing in post-production, which is easier for some, but less “accurate” in that you will be manipulating data as opposed to capturing it in its “correct” or native form.
Either way, many of these things mentioned above, such as practice, comfort with settings, planning, and execution against your creative vision play a role in determining what additional camera settings you may enjoy controlling. Here are some examples:
- Shutter drive speed: Different cameras offer different frame rate speeds for continuous shooting. In environments as dynamic as underwater work, you may find it useful to shoot at higher frame rates to minimize the impact of some of the variables aforementioned, such as hair, fabric, air bubbles, etc.
- Focal points: Explore your camera’s focal point options and adjust them accordingly. Some cameras offer face or eye recognition technology, and many provide movement or zone-driven focus detection to assist you. You can also predetermine the focal area and frame the shot accordingly.
- On-screen displays provide you with real-time feedback about things you care about, from light meters to levelers. Put your technology to work for you when it helps.
- File Compression: Most cameras enable you to shoot un-compressed, or RAW. This gives you the most post-production flexibility and control but occupies the most space as it can create large files, especially for video. But you can also reduce file size and create more ‘shareable’ compressions such as JPEG.
10. POSTPRODUCTION EDITING
This is an area that’s rapidly changing in imaging across the board. The editing process can be as cumbersome, if not more so than the capture itself. Programs like Lightroom and Photoshop for stills, and Premiere and Final Cut for video are some of the most popular editing choices for professional creators and provide infinite possibilities not only for editing your content, but blending it with other graphics and modifying it entirely. There are many who focus more on the post-production than the capture itself, but that’s fodder for a different post. More basic software now comes standard with most devices, both on desktop and smartphones. You can start with some of the automated basics, such as color correction and cropping, and slowly graduate into more sophisticated editing practices. The number of options and sophistication of available tools has exploded, and there’s no shortage of post-editing applications to help customize your images as you see fit. The best part is that we appear to be entering a maturing phase for many of these tools allow you to choose between flexibility (where you can control everything independently) and ease of use (where computational power does the work you direct).
My advice is to try to ‘get it right’ on camera. The closer to your vision the capture the better the end result. Think of editing as polishing or finishing touches. There are lots of programs and apps that will let you touch up your photos without spending hours. Unless, of course, you’re an expert editor, and/or your creative vision includes adding special effects, or dramatically modified imagery to the finished product.
About the author
JR deSouza is a ’92 Olympic finalist, ’93 World Champion, World Record Holder, who worked in technology and imaging for his professional career, including companies like Samsung, TiVo, Disney, and Dreamworks Animation, where he was involved in the launch of the DVD, high-definition video, and image capture, broadcasting, recording, and streaming, first in Silicon Valley then Hollywood. JR founded Outex to combine his passion of photography and water, and has been working with world-class, award-winning photographers in multiple imaging fields. As an example, 6 different sports photographers at the Tokyo Olympics use his invention on a regular basis, which is also used by production companies for network shows like Survivor, Amazing Race, National Geographic, Discovery, BBC, etc. A frequent speaker and collaborator for the photo and video industries, JR has photographed both the men’s & women’s Olympic water polo teams, and numerous Olympic and high-level athletes.
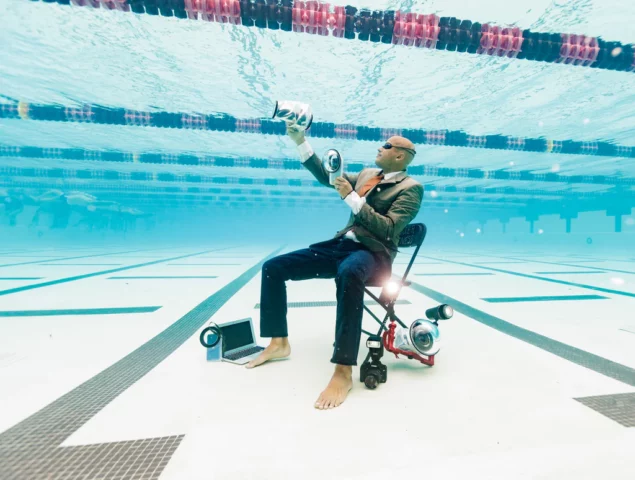
Outex Founder JR DeSouza by photographer Brett Stanley
About Outex
Co-founded by an Olympic swimmer, Outex brings 13+ years of professional experience in the photographer and cinematographer market, producing a patented system of waterproof housings for cameras, lenses, lighting, triggers, tripods, accessories, and other imaging equipment. The LA-based company was founded in 2010.